Sometimes it almost seems as if the chaos is clearing its way by itself . At some point we all face the same problem: Do we have too many gardening tools or are we just bad at it, order to hold ? Read here what you can do to keep your garden tidier.
Why we should sort ourselves
What doesn’t accumulate over the years? Anyone who owns a garden therefore needs a lawnmower. Hedge owners should get a hedge trimmer. If you have trees in your garden, you also need pruning shears and a fruit picker. A large rake for the autumn leaves is imperative. If you are the proud owner of a vegetable patch, you need several smaller devices for weeding and planting. Even those who only buy the bare essentials will find an impressive number of garden tools .
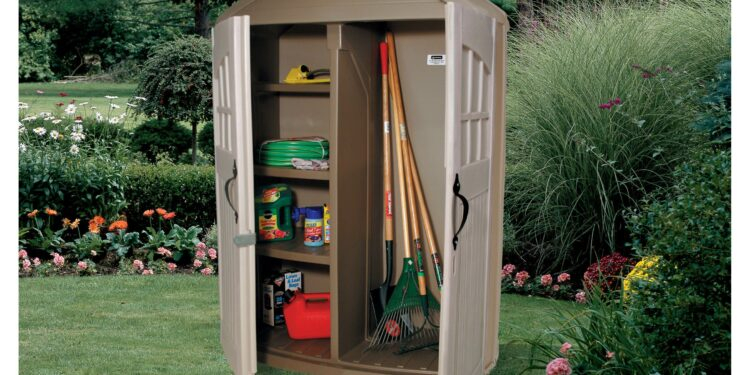
Equipment for the garden is a great thing. The only question is: where to put all the utensils? Off to the garden house! Especially when the weather gets worse. But there might already be bicycles, children’s toys and then the new lounge furniture . It’s getting tight in the shed. A dry place is especially important for the wintering of the garden equipment. So the garden shed must be properly organized so that order is created and both garden tools and the beloved garden furniture have a place in the dry.
How you organize your garden shed most efficiently so that as much storage space as possible is created, of course, also depends on the model. As you order without constantly rearranging hold, we show you this clever and creative solutions.
10 tips to keep garden sheds tidy
Set up suitable shelves
Flower pots, fertilizer, seeds and much more find their place here. Be sure to use sturdy shelves . If some flowers hibernate on these shelves or potting soil is stored in winter, it is important that the shelves in the garden shed can be loaded accordingly. However, caution is advised with surrounding shelves in a shed. Mounted high enough, you no longer bump your head on the shelf, but you can no longer get too high to the objects lying on it. Therefore, remember to find the right height for you before installation .
Handle hoses better
Hoses, ropes and cords rolled up and hung on the wall quickly bring order to the garden shed. So there is enough space on the ground and you don’t get annoyed about knotted and tangled garden hoses. If you use a hose holder here , the even winding of the hoses is much easier and you can be sure that it will really withstand the load. Organizing the garden shed is so easy.
Organize tools sensibly
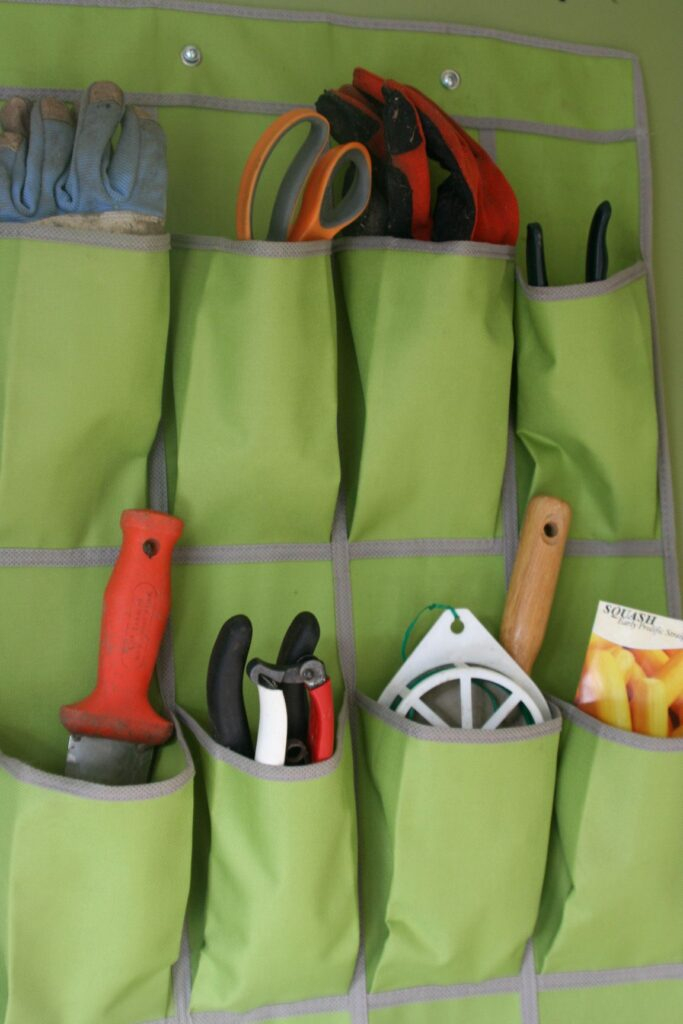
How about a tool holder ? Hammer, secateurs, etc. are always ready to hand and clearly arranged on the wall, saving you the hassle of searching. You can choose a ready-made variable perforated panel system with a large selection of hooks, shelves, chutes and tool registers for craftsmen with a variety of tools. Alternatively, you can adapt this organization system exactly to your needs and space conditions by easily building it yourself.

DIY: tool wall
- Take a chipboard or any board made of wood and place it on the floor.
- Then arrange all of your tools on it as you want it to hang later. Even if this takes some time, you will be amazed by the new order later.
- Mark the locations for nails and screws as mounts. Different colors will help you later with the assignment.
- Use screws for heavy tools and nails for light objects. Both are attached at a slight angle so that the tool does not fall down later.
- Always hang heavier tools such as hammers down. In this way you avoid major damage if it should fall down.
- Make sure that you always keep dangerous tools such as knives out of the reach of children.
- The wall can then be painted if necessary and the outline of the tools can be traced. So you have an immediate overview of which tool is missing and where.
- The wall now only needs to be installed in the garden shed.
Does your garden shed tend to draw more moisture? Then you should be aware that tools can rust. Make sure that the tools and equipment are clean and rust-free when they are stored . If necessary, spray the areas at risk of rusting with WD-40, silicone oil or another rust preventive agent after cleaning .
Mount device holder for free floor
In order to accommodate all garden tools with handles such as brooms, rakes and the like in a space-saving manner, you should install a bar with clamps and hooks in your tool shed. You no longer waste unnecessary space in the corner of your garden shed. Thanks to the hooks, you can also hang other smaller accessories. Since device holders are also available individually and not just as a bar, you are extremely flexible in arranging the heights or distances.
Stackable boxes for small parts
Storage boxes made of plastic, metal or wood are also a good idea, because they also protect against moisture and direct light. Stacked on top of one another, the boxes take up little space in the shed.
Garden cushions should not be left outside in the cold season. So you have to spend the winter in the attic, in the garage or in the garden shed. Do not just lay the garden cushions on the ground, otherwise moisture will be drawn in and they may start to stagnate or become moldy. It is better to store them in large storage boxes and ventilate them regularly over the cold months.
First aid kit
When organizing your garden shed, don’t just think about your equipment. Also, always store a pack of plasters or a nonexistent first aid kit in the garden shed. If you do get injured, you have quick access to the bandages you need.
Store ropes, cords and threads properly
Twine can quickly become a major nerve factor. If the ball falls down, you quickly end up with a thread salad, in most cases you can no longer find the right beginning and an orderly roll-up is out of the question after the first use. Organizing the garden shed is understandably no longer fun. The solution to this problem is a thread dispenser on the wall . Are you running out of space on the wall? Alternatively, you can attach an empty DVD / CD spindle to the underside of a shelf or to the ceiling .

DIY: thread dispenser (wall)
You need:
- Aluminum funnel
- Nails
- hammer
- yarn
That’s how it’s done:
First hold the funnel with the large opening against the wall and fasten it to the wall with nails at the top. Now just place the ball of yarn in the funnel. Pull out the previously detached thread from the lower side of the funnel. Ideally, you should also hang the scissors on the funnel.
DIY: thread dispenser (blanket)
You need:
- DVD / CD spindle
- Cordless screwdriver, drill
- Screws
- yarn
That’s how it’s done:
Open the spindle and drill two holes on the lower side of the spindle. Also drill a hole in the center of the cover of the spindle with the size of the diameter of the thread. Hold the spindle base on the underside of the shelf and fix it
to the wood with a cordless screwdriver. Place the thread in the cover of the spindle and thread the beginning of the thread through the pre-tied hole. Now just turn the lid on the bottom and your thread dispenser is ready. So you always have an eye on how much thread has already been used and can look forward to an organized garden house in the future.
Read More: These are the 8 hottest garden furniture trends for 2021
Sort brushes cleverly
You can organize brushes with metal frames or other small metallic devices quickly and easily. Buy a magnetic knife holder and mount it on the wall of your garden shed. Due to the magnetic field, the brushes simply stick and can be removed and hung up again as often as desired. You can now hang the brushes with the bristles facing down and allow them to dry as well as possible. The advantage of this storage method is that less dust collects between the bristles and your brush is like new even after a long period of time.
Clearly stow balls
Basketball, volleyball, soccer: over time, a lot accumulates on balls. The balls can be tidied up easily and space-saving with the help of luggage clamps.
DIY: luggage rack
You need:
- Wooden boards (for example 4 pieces of 30cmx15cm, 2 pieces of 50cmx15cm).
Please note: the dimensions of the boards are based on the largest ball. This should fit on the base plate. - 2 wooden panels (here in the size 50x30cm)
- 4 angles
- 5-7 luggage stretcher (adjust the length to the desired height of your shelf)
- Nails and screws
- Cordless screwdriver, hammer and dril
That’s how it’s done:
Make a “U” from 2 short and one longer board. Be sure to pre-drill the holes to prevent the wood from splitting. Now you can attach the wooden panels to both finished parts as a floor. An “open drawer” is created. You can drill holes for the lashing straps on the front and sides. If you want to fix the shelf in a corner, three holes on the front and two on one of the sides are sufficient. You can now screw the two wooden boards to the wall of your garden house with angles. The distance depends on the length of the clamps. The hooks of the luggage clamps are attached to the holes and you can put the balls on the shelf.
If you also store devices that are operated with a rechargeable battery in your garden shed, the following should be observed in the cold season: Tools that are equipped with lithium-ion rechargeable batteries should be charged up to two thirds of their charging capacity before they are put into the Go winter break . In this way you do not lose too much energy even during long periods of rest.
It is different with older devices that are still equipped with nickel-cadmium or metal hybrid batteries . These tend to self-discharge. There is a risk of the batteries becoming deeply discharged, which is why they should be checked and recharged every two months . If the battery is deeply discharged, it must be disposed of.
It is also important to ensure that the batteries are stored in a frost-protected room . Temperatures between 5-10 ° C are usually recommended as ideal . If your garden shed is less well insulated, we do not recommend storing it there. The manufacturers usually provide precise information in the operating instructions.
Extra tip: look forward to the new order
If you take a few tips to heart, you can organize your garden shed in a short time and turn it into a well-stocked storage location. Existing storage space is used effectively and clutter and tripping hazards have no chance in the future!


